Table des Matières
The system allows you to add courses to the main platform through the system administrator account, following these steps:
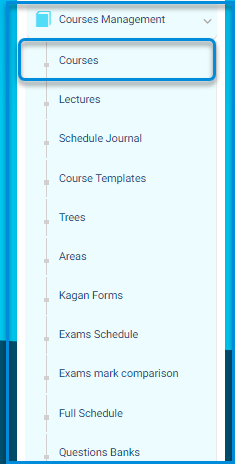
- Click on the Courses Management drop-down from the sidebar menu.
- Click the ‘Courses’ button to navigate to the screen for courses and their contents.
Menu Principal >> Gestion des Cours >> Cours >> Ajouter un cours
Pour Ajouter un Cours : #

- Sélectionnez la catégorie de cours.
- Saisissez un titre pour le cours.
- Saisissez le titre dans la langue secondaire.
- Entrez le numéro du cours.
- Sélectionnez le niveau du cours.
- Choisissez un modèle de cours dans la liste déroulante.
- Entrez l’ordre du cours dans le bulletin.
- Si vous souhaitez faire une demande de GPA pour une école, vous devez remplir l’option Heures de crédit, car elle est liée à l’équation GPA.
- Ajoutez une note de réussite pour chaque cours. Cette option est liée au rapport d’échec du cours de l’élève.
- Cochez la case Masquer dans les rapports de notes pour masquer le sujet de la fiche de rendement.
- Choisissez une icône pour votre cours.
- Cliquez sur Ajouter.
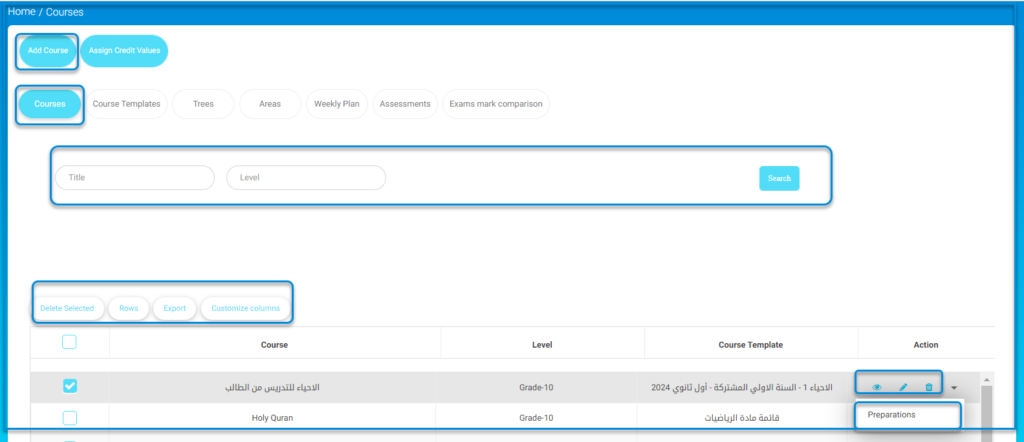
- Click the Add Course button to create a new course.
- Use the Assign Credit Values button to manage or assign credit values for courses.
- Use the Title and Level fields to filter the course list and click the Search button to display the relevant results.
- Click the Delete Selected button after selecting courses with the checkboxes to remove them.
- Adjust the number of rows displayed by clicking the Rows button.
- Export the list of courses by clicking the Export button.
- Customize the columns visible in the table by clicking the Customize Columns button.
- Use the Preparations button in the Action column to manage course preparations.
- Click the Edit icon in the Action column to update course details or the Eye icon to view course information.

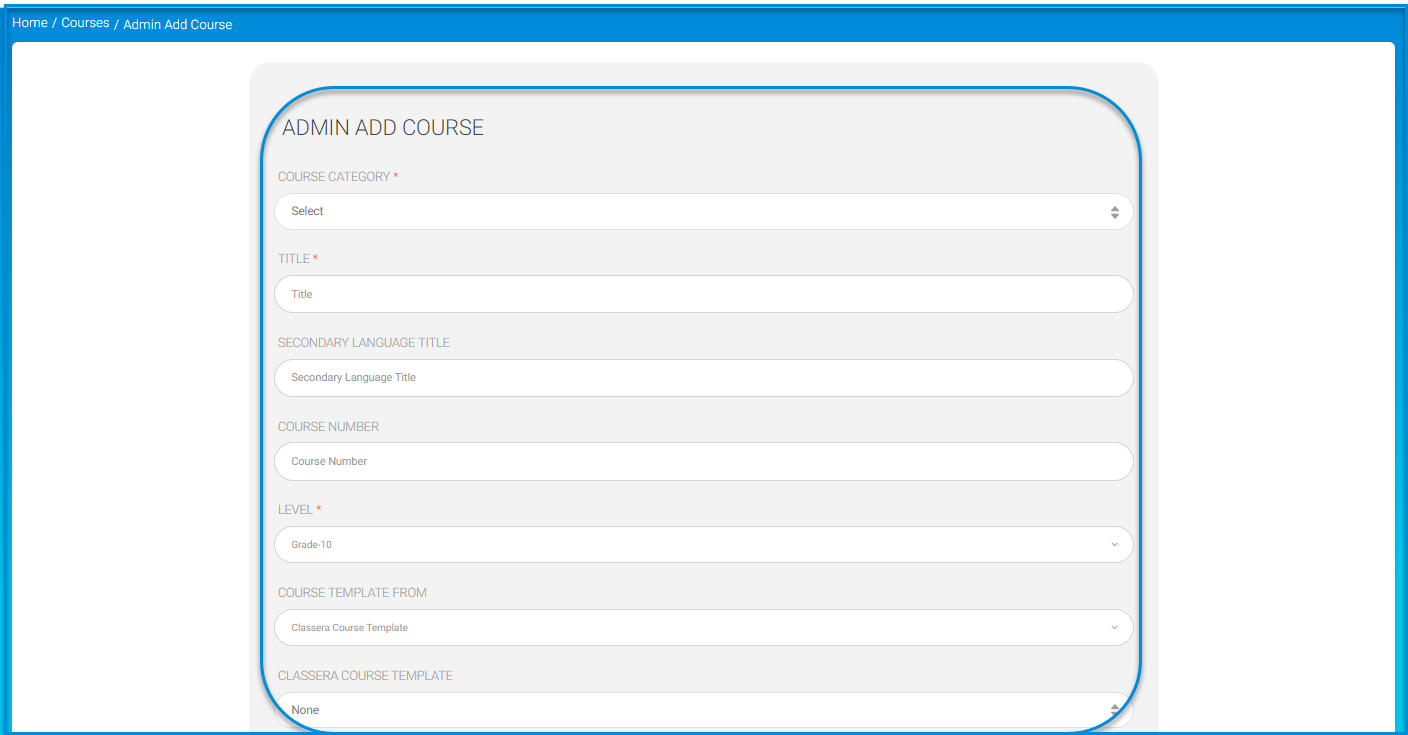
- Select the appropriate category for the course from the Course Category dropdown.
- Enter the course name in the Title field.
- If applicable, provide a secondary language title for the course in the Secondary Language Title field.
- Enter a unique identifier for the course in the Course Number field.
- Select the course level from the Level dropdown.
- Choose a template for the course from the Course Template From dropdown if applicable.
- Specify the Classera Course Template if required.
- Fill in any additional fields as necessary for the course details.
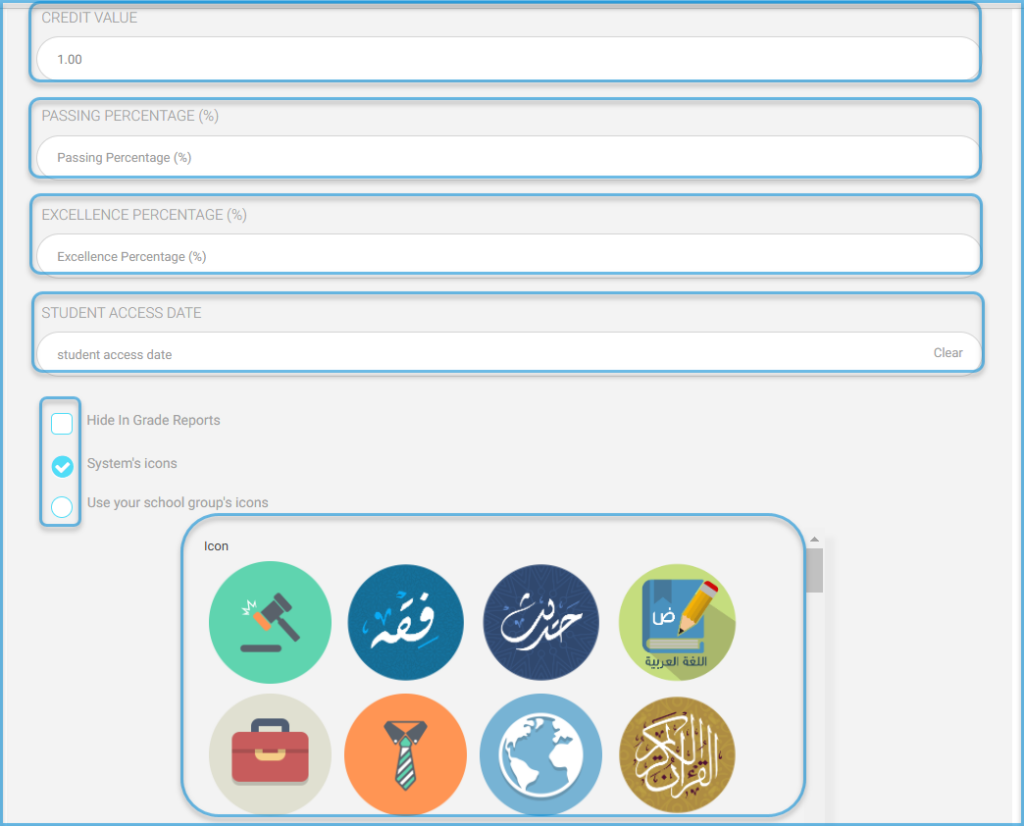
- Enter the value for the course credit in the Credit Value field.
- Specify the minimum passing percentage for the course in the Passing Percentage (%) field.
- Enter the percentage for excellence recognition in the Excellence Percentage (%) field.
- Set the date from which students can access the course using the Student Access Date field. Click Clear to reset the date if needed.
- Check or uncheck the Hide In Grade Reports option to control whether the course appears in grade reports.
- Choose the type of icons to use for the course. Select System’s Icons to use predefined icons or Use Your School Group’s Icons to apply custom icons.
- From the displayed icons, click to select the one you want to associate with the course.
- click the Add button.


Note #
The teacher will be able to add the courses, but they will only appear in the student’s account on the specified date.
The course will appear as inactive for the student until a specific time, allowing the student to be aware of the start date of the activities of this course.


