Table of Contents
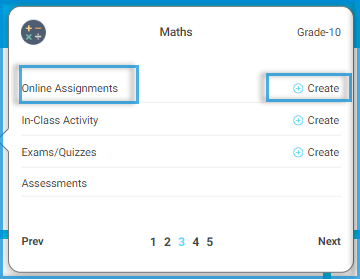
You can have direct access to all your assignments from the third tab of your course, where you can add and manage the assignments. Here are the steps on how to create assignments.

To Create Assignments: #
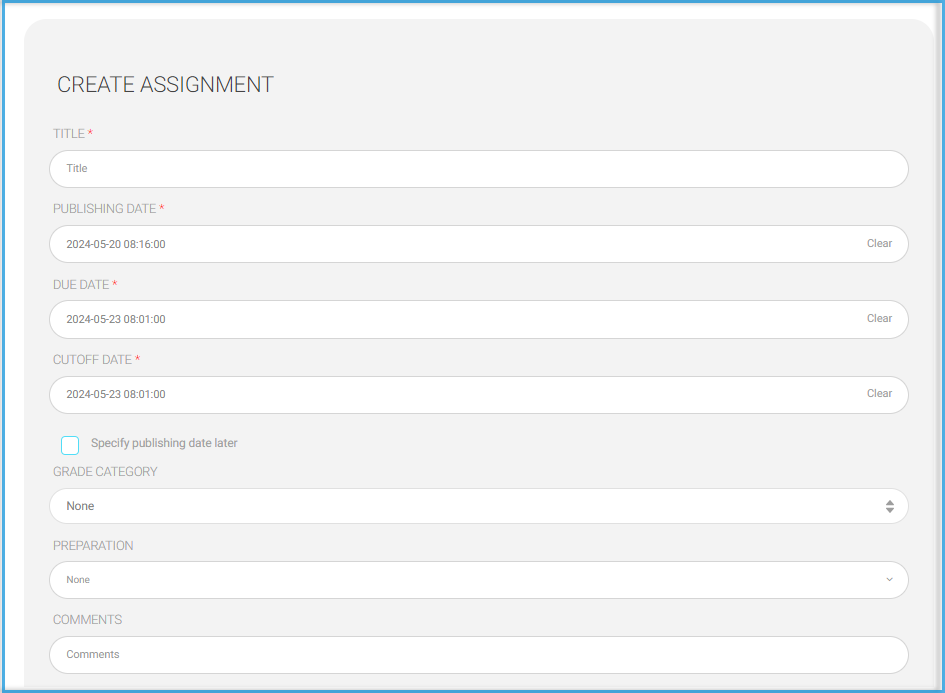
- Type the assignment title and make your title specific by lesson/ topic name. It’s not recommended to use generic titles like HW 1 or Week 1.
- Set the date on which the students will receive the assignment.
- Set the main deadline date.
- Set an extra time > You can offer the students extended time after the deadline if needed.
- Check the Specify publishing date later box if you don’t need to decide the dates now.
- If this assignment is graded, you can choose one of the report/grade book columns. Choosing one means the automated mark will be inserted directly into the report.
- Choose the preparation related to this assignment.

- Type comments if needed (Optional).
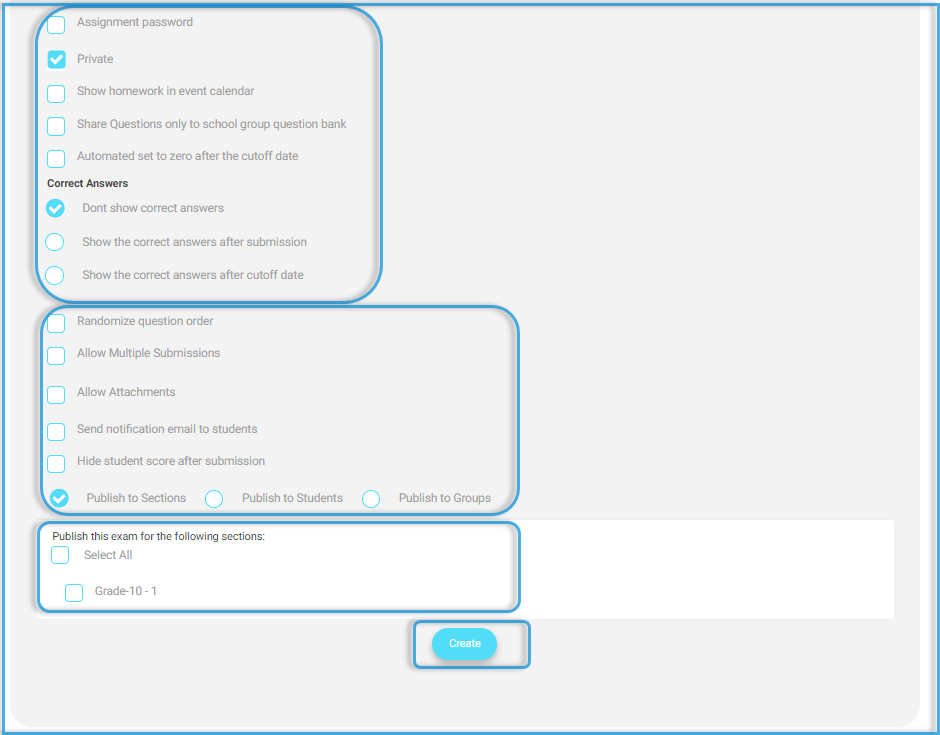
- Check the Assignment password box if you want to block this assignment; students with the correct password can take it.
- Private should be checked if you do not wish to share the questions in any public question bank.
- Share your questions in the school custom question bank. School question banks could be created by the system admin and assigned to you.
- Show correct answer options allow you to decide whether to share model answers or not, and if yes, when would you like to share them? The third option, Show the correct answer after the cutoff date is recommended: it ensures that students can’t share answers.
- Check the Randomize question order box to have each student get the questions ordered differently.
- Check the Allow Multiple Submissions box to let students resubmit multiple times. You need to enter the maximum number allowed.
- Check the Allow Attachments box if you want the students to be requested to attach files as a part of these assignments. If selected: You need to specify the attachment mark.
- Check the Send notification email to students box if you want an internal email to be sent in addition to the normal assignment notification.
- Choose to publish to whole classes or select a certain student or group.
- Click Create to save your settings and take you to the next step: Adding Questions.


